How to Speed up Windows 10 performance (Without any Software)
")
How to Speed up Windows 10 performance (Without Software)
Hello Readers, thank you for staying with us. And today, I am here with another interesting topic that is how to speed up the performance of Windows 10 that too for free and without using any software.
This is a question that you all might have someday or the other in your life, whenever your Windows slow down. But now your wait is finally over. We are here to answer this question so that every time your Windows slow down you can refer here.
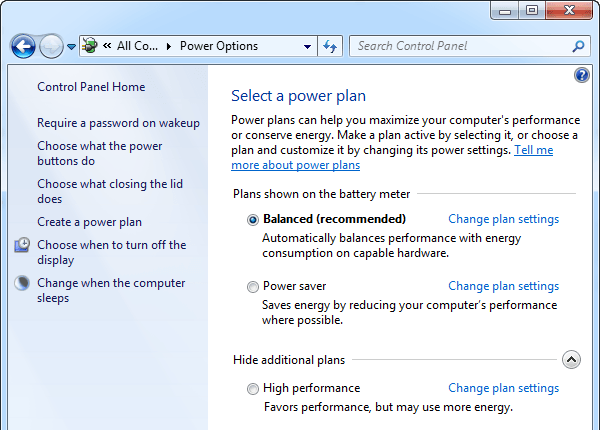
Step 1: Power Options
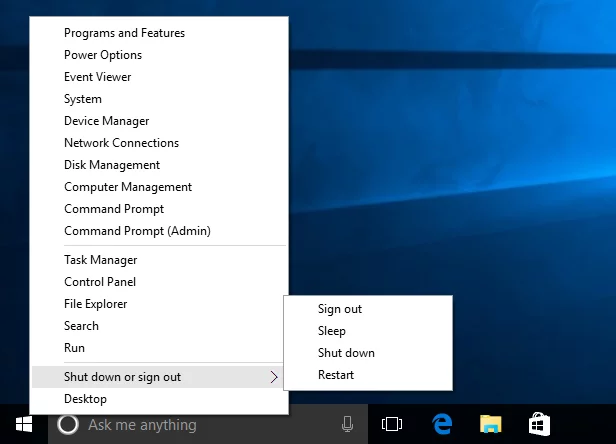
- Just Go to your start menu and search power options on the result and just click on it. Sometimes it is also shown as Edit Power settings instead of power options.
- Then you will get to this control panel power options window. Here you can see the default power plan is set as balanced change it to high performance. And then close the power options.
Step 2: Disable Unwanted Startup Programs
- First, you need to go to the Task Manager. The easiest way to get to the Task Manager click on any empty space on your Taskbar and choose Task Manager from here.
- Once you are at the Task Manager. Go to Startup and here you will see all the programs that start up automatically when your system starts. When you install a program in Windows 10, it may add a small program that runs when Windows starts.
- After Installing a lot of Software you may experience your boot-up process becomes slow. As well as this these programs run on the System forever and it causes your system performance to slow down. If there are programs that you don’t use much they probably no need to start every time windows do. So I will tell you how to disable unwanted startup programs to achieve a better startup speed and System Performance.
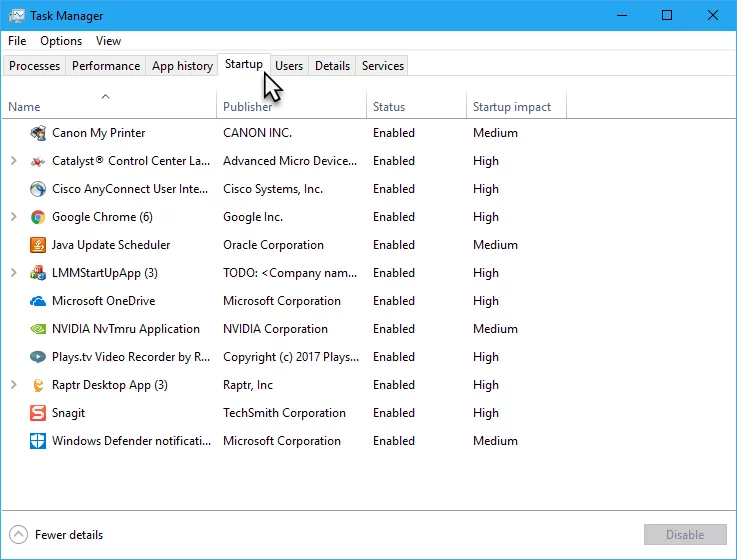
- And you can see here many programs that we regularly use as well as many programs that we never use on a daily basis. Identify them and apply this.
- For example, If you are not an active Play tv Video Recorder user you can disable Play TV Video Recorder from automatic start-up once your system startup and make sure do not disable your programs published by Microsoft Corporation because maybe these programs running your windows and do not disable Antivirus too. Now close the Task Manager.
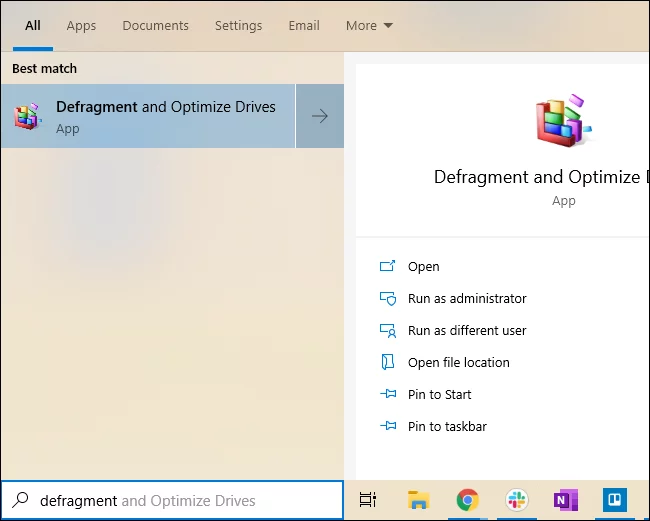
Step 3: Defragment and Optimize Drives
- Go to start menu and search Defragment. And click on Defragment and Optimize Drives
- Now you will see this Window shown below. From here you have to select your System drive. Usually, it is C drive so let’s select C and click on optimize.
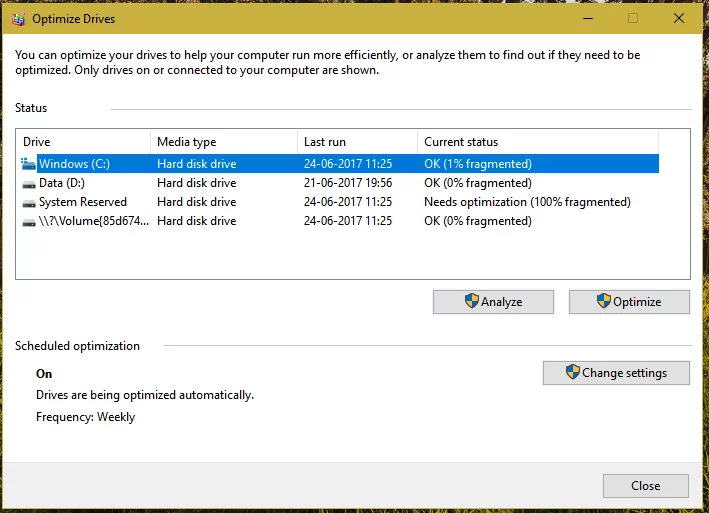
- Now you can see your System drive is optimizing. Once it is finished you can close this window.
Step 4: Delete Unnecessary Temporary Files
- For this, Head Over to the start menu and right-click on the Windows icon. Then choose Run from here.
- Now Type %temp% and click on OK.

- Now will see a folder select everything in it and delete it.
- Choose the Run box again by clicking on the Windows icon and choose Run. Now Type temp and again a folder will appear, and here you will see a dialog box giving a warning You don’t currently have permission to access this folder click on continue.
- Then select all the files in it right-click and delete.
- Choose Run box again and this time Type Prefetch. Now click on OK. Repeat the previous sub-steps and close the Window.
Step 5: Clean up Memory
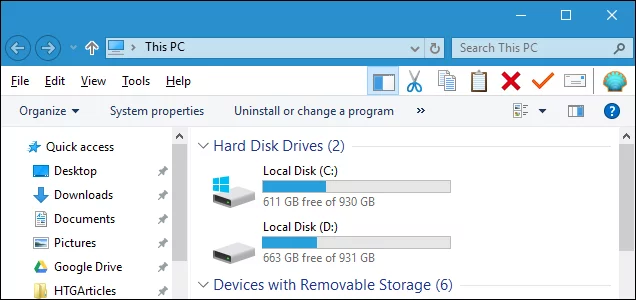
- Go to your File Explorer Right click on your system drive or C drive. More specifically where your Windows 10 is installed.
- Now choose properties from there and you are on the General Tab.
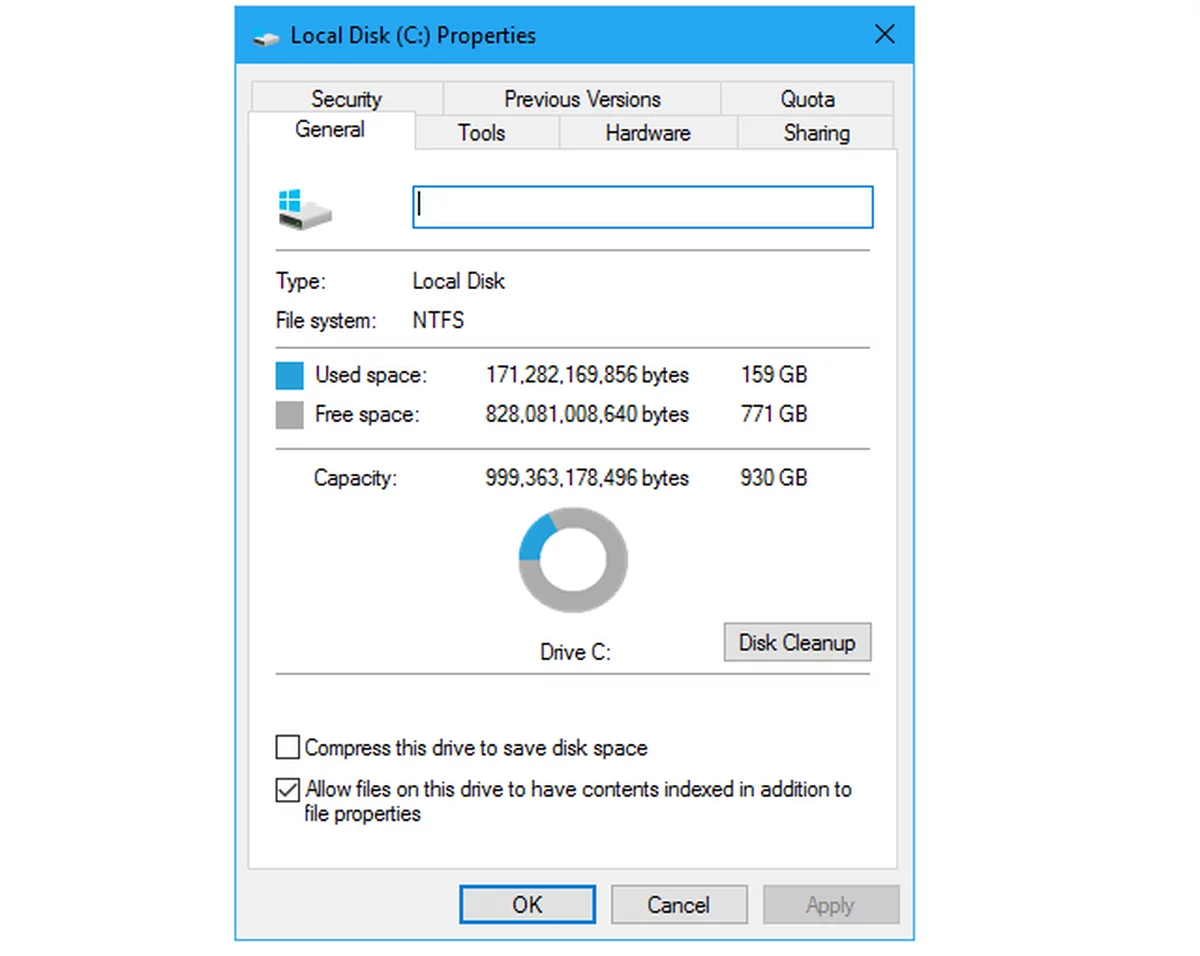
- Here you will see the Disk Cleanup option just click on it and allow it to scan the files. When the scanning is finished this window appears

- Just click on the cleanup system files option. And it will scan again. After scanning is finished you will see a Window click on ok. And it will ask you are you sure you want to permanently delete files?.
- Click on delete files. Don’t worry it will only delete the unnecessary files.
Step 6: Reduce Run Time Service
- First, open the Run box by right-clicking on the Windows icon and choose Run. And you wanna type in msconfig and then click on ok.
- You will see System Configuration Window and from here go to Service.
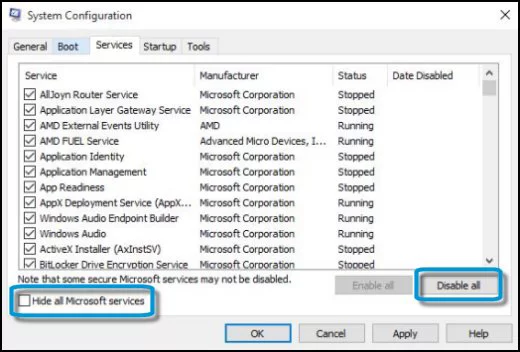
- And click on Hide all Microsoft Services. That’s really important because I don’t want you to delete any important things accidentally. So make sure you click on this option and click on ok.
Step 7: Registry Tweaks
- Launch the Run box again, for that head over to the windows, right-click on it and choose Run. Then type in regedit and click on ok.
- You will see this Window.
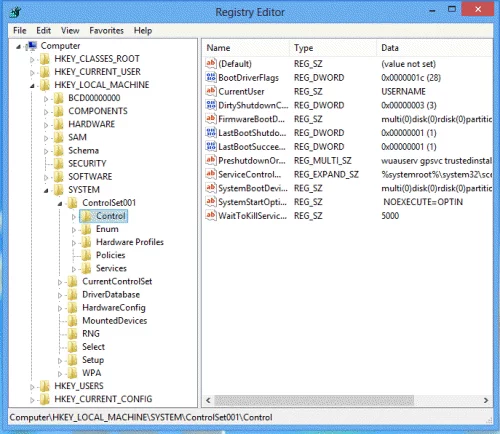
- And from here go to HKEY_CURRENT_USER. Then click on Control Panel and then double click on the Mouse Folder.
- Now Double click on Mouse hover time option and change its value to 10. Then click on OK.
- Now Double click on Desktop folder and scroll down a little bit, then double click mouse show delay and change its value to 10 and then click OK. And by doing this we have increased the mouse response time.
Step 8: Visual Effects
In this, I will show how to disable your Windows 10 interface graphically performance, to boost your system performance. And please note it won’t affect your gaming graphics or program graphics. It will only reduce the graphics performance of the Windows 10 operating system.
For example, After you do this you may feel the loss in visual effects on your Windows 10, but it will improve your system performance to the maximum level.
- Move on to your start menu and search system. Now click on it you will get to this Window.
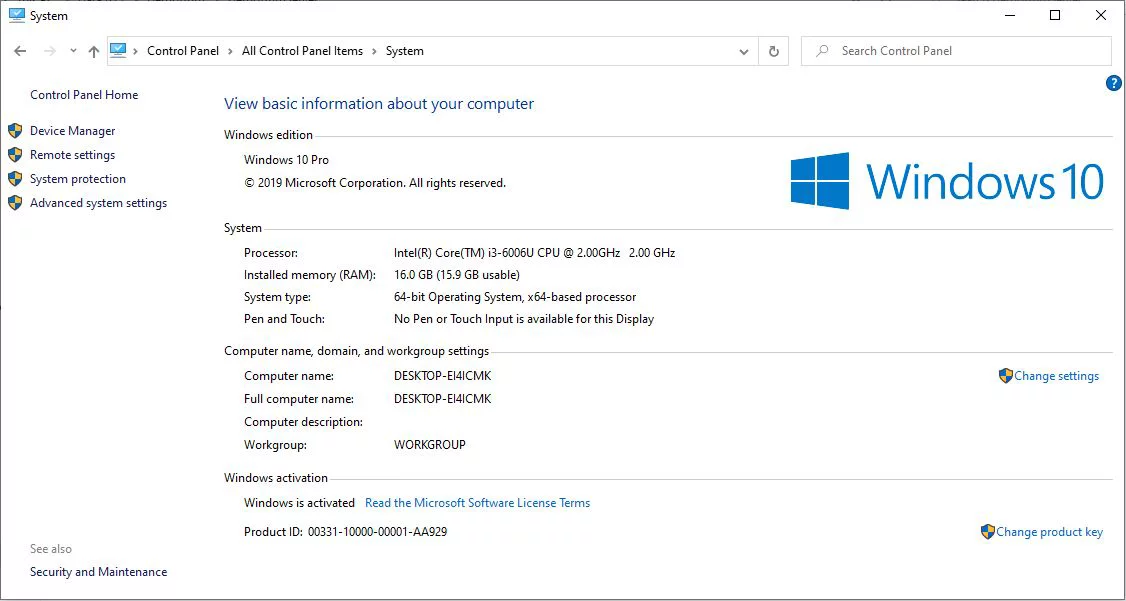
- Now click on to Advanced System Settings. Then you will get to a small window.
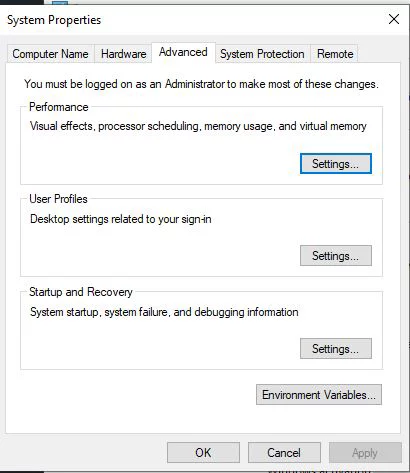
- Here you will settings button under Performance. Just click on this settings button and you will get to this small window of Performance options.
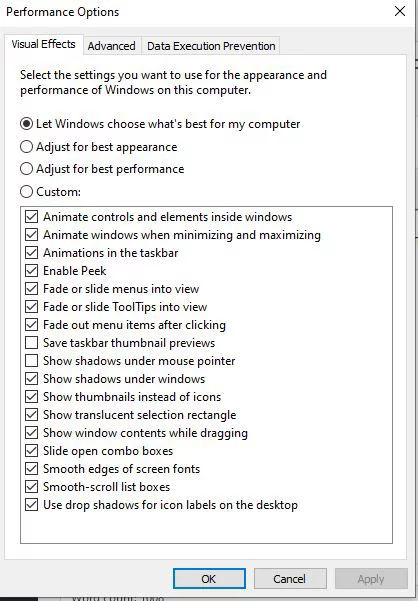
- This setting is basically everything that makes your Windows 10 look beautiful, as well as these are the main things that use your computer resource like your RAM, Processing power, and Graphics as well.
- I only recommend this if you want extreme performance that is possible with your machine.
- Click on Adjust for best performance and you can see it will automatically uncheck all these things.
- If you want you can select some of the options, that you can’t live without. For example, In my case, I would like to tick this option to show shadows under the mouse pointer.
- Once you are done editing just click on apply and OK.
Now let’s take a proper system restart.
How to Speed up your Windows 10 (Video Tutorial)
Congratulations! Now you have learned how to speed up Windows 10 performance every time your windows slow down believe me these steps help you a lot. And if you have any queries about this and any other thing please let us know in the comment section below. We are always here, for giving you valuable and informative content that definitely solves your problem.