How To Make a Raspberry Pi 4 Smart Mirror (Tutorial)

Raspberry Pi 4 Smart Mirror Complete Guide (Easily)
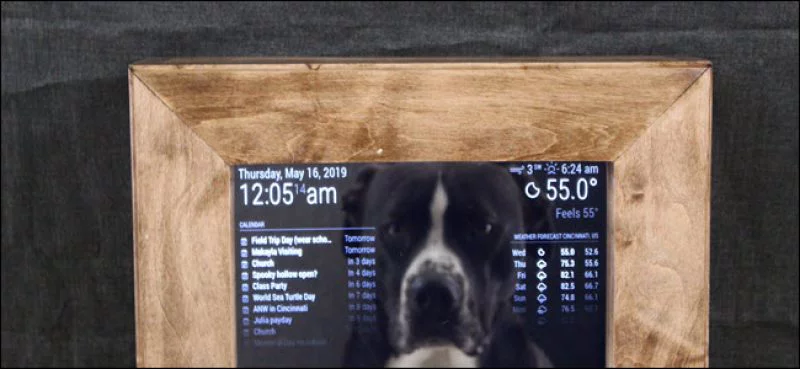
A smart mirror is an electronic two-way mirror that has a two-way display. It informs the user of different types of information through its different types of wedges. It has a multimedia capability for streaming images, videos, etc.
So that the user can access the weather-related data using this smart mirror. Using Raspberry Pi 4 smart mirror is made in a magic mirror platform. Magic Mirror is a platform where Raspberry Pi is easily installed.
It is a user-friendly platform which allows user to work easily.
Hardware you Need to Set Up Smart Mirror
- Raspberry Pi (I used the Raspberry Pi 4 Model B version, due to the fact it has easy accessibility and an easy to set up wireless option)
- Monitor (I used a 12″ X 20″ Samsung monitor with an HDMI input)
- Two Way Acrylic Glass Mirror (There are some online, however, I used the cheaper one Hacker House recommended – see link at bottom)
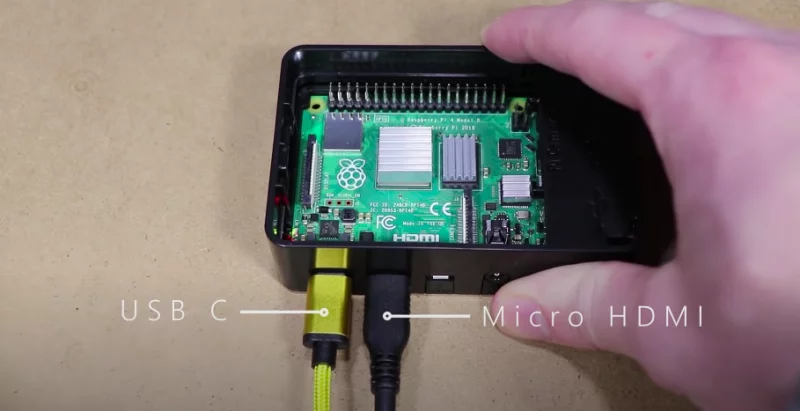
- HDMI Cable
- Micro HDMI Cable for Pi Power Supply
- Wood Glue
- Screws
- Wood (I used two 8ft long pieces (a 1″ x 3″ and a 1″ x 4″ ) to cut the inner and outer frame)
- Keyboard (USB)
- Mouse (USB)
- Clamps
- 3D Brackets
Raspberry Pi 3 and 4 are preferable for this project work. Other older versions will also work. But users have to make sure that they have a Wi-Fi adaptor available for the work. A micro SD card is required. SD card may be Noobs installed or Raspbian.
SD cards will also work. An HDMI monitor is required. This will work as the smart mirror’s screen. It can be any type. If the user wants a large screen then they can use 24/32- inch screen. Otherwise, users use a 7/10-inch HDMI display. Finally a self -made wood or plastic frame is required.
Guidelines to Make A Smart Mirror With Raspberry Pi 4
So here we have come up with a step-by-step guide to make a smart mirror with Raspberry Pi4. But first, it is really important to understand the hardware required to install a smart mirror with Raspberry Pi4. Let’s find out what requirements can make this smart mirror installation successful.
Step 01: Setting up the Raspberry Pi Process
After completing the connection properly user has to install the software set up. The complete process depends on the user’s hardware system. It takes around 20 minutes for installing.
The user has to copy-paste the command bash in the command prompt.
-c “$(curl -sL https://raw.githubusercontent.com/MichMich/MagicMirror/master/installers/raspberry.sh)”
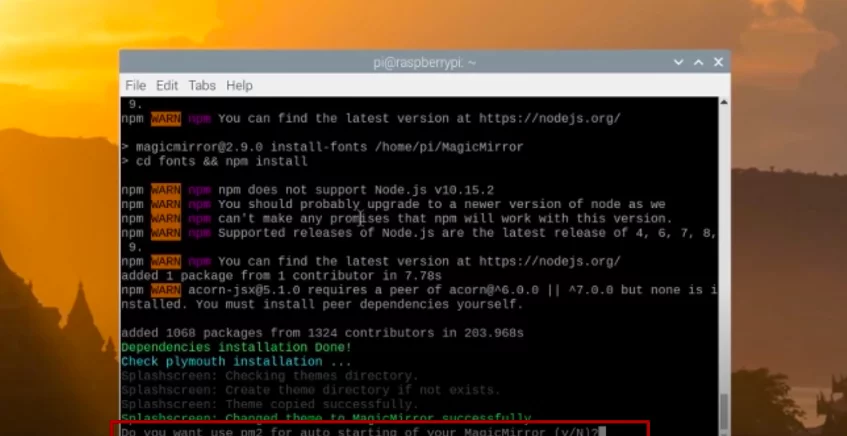
Then it will start the download process of the magic mirror and will be installed automatically.
During the process, the users will come across two messages on the screen.
- If they want the auto start of the Raspberry Pi magic mirror or not
- Press “Y” and press the “ENTER” button.
For the customization process user have to press the ‘Alt’ button from the keyboard.
Step 02: Customization Process (Date, time, & Weather Report)
In this process, the magic mirror can be a smart mirror via some processes.
Select the orientation; landscape or Portrait.
Find the ‘config.js’ folder. This is the folder user can easily customize date, time weather report, and more.
Set the ‘clock module’ and ‘current weather module’ according to your convenience. The user is also able to show the headlines by using the newsfeed module.
Step 03: Creating a Frame
Users have to connect the hard wares properly. It is not so difficult. A user has to connect in such a way that it will look like an actual mirror.
- Connect Raspberry Pi board in the back of the monitor.
- In the upper-face of the monitor, connect the two-way mirror or the one-way reflective film. The one-way reflective film will work as a mirror. The two-way mirror is the best choice.
- Mount that part within a plastic frame (wooden frame is also acceptable) for giving a good look.
- Connect the power supply and the SD card to their proper place in the Raspberry Pi board.
- The mouse and the keyboard can be connected with the endpin of the Raspberry Pi board.
Step 04: Starting Process of the Mirror

- First, the user needs to Boot the system.
- Press Windows key + R to open the run dialog.
- The command line will appear on the screen.
- Create a shell script and add the script to the file.
- Press the Save button and then Exit.
Raspberry Pi 4 Smart Mirror Setup (Video Tutorial)
Congratulations !! So you know the total procedure of making a smart mirror with the help of Raspberry Pi 4. If a user will follow this article it must be helpful for them. This is a small project detail but if users want they can make some improvements on it.
They can modify the software program for getting better performance. They can save the power of this. When nobody is present in front of the mirror then they can save the power of this. They can also use sensors for modification with the Raspberry Pi board.