Raspberry Pi 3 Complete Tutorial – Let’s Get Started

Raspberry Pi 3 Complete Guide
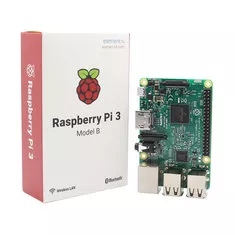
Hi everyone, this is Aamir Hussain and welcome to Raspberry Pi 3 starter guide !! In this article you will learn what is Raspberry Pi, how to set it up and what cool things you can do with raspberry pi. Raspberry Pi is world’s smallest single board computer, developed in United Kingdom by Raspberry Pi Foundation on 2018.
The main purpose of this device is to provide education to small kids in developing countries in very low possible cost. It runs on Debian based operating systems to learn coding, programming and basic computer knowledge.

But from 2008 to 2018 world is changed very fast and people loves to use Raspberry Pi as various platforms like Hacking, Programming, robotics, Multimedia, Weather Device, Gaming and thousands of projects. In this article i am helping beginners to get started with Raspberry Pi 3 Model B and how to do those amazing projects. Let’s get started !!
The Raspberry Pi is not available in normal computer store, its available on online shopping sites. You can order your Raspberry Pi 3 and its accessories from banggood.com, its a most popular website witch provides cool Electronics Gadgets, RC Helicopters, Toys etc. Its ships products all across the world without delivery charges. I got my Raspberry Pi 3 & its all accessories from banggood.
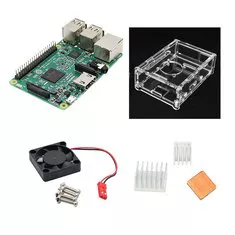
I said accessories right !! Yes guys to run the pi you will need its accessories, a power adapter and a Micro SD is compulsory to run the pi. But there are lots of cool gadgets available on banggood.com such as Pi Case, Heat sinks, Touchscreen LCD, Camera, Battery, sound card, cooling Fan, Game controller and many more things.
Check out all cool stuffs from the links given Below. But first Watch the Raspberry Pi 3 Tutorial Video to learn How to set it up.
Raspberry Pi 3 Tutorial Video (Watch & Learn)
— Raspberry Pi 3 Hardware Review: 01:33 — What Accessories Needed to Setup: 02:21
— Heat Sink Installation of Pi: 03:00 — Raspberry Pi Case + Pi Fan Installation: 03:35
— How to install Raspbian on MicroSD Card: 06:04 — Pi Display Monitor Guide: 09:48
— Connect VGA monitor on Pi: 10:05 — Setting up with Raspberry Pi 3: 11:31
— What you can do with Raspbian OS: 11:57 — 5″ & 3.5″ Touch Screen LCD Install: 17:00
— How to make Raspberry Pi Portable: 17:27 — Raspberry Pi Operating Systems: 19:27
— Play 1080p Video on Raspberry Pi 3 using OSMC: 20:35 — Pi Gaming using Retropie: 22:11
— Playing Mario on Raspberry Pi 3: 22:40 — Playing Tekken 3 on Raspberry Pi 3: 24:19
Raspberry Pi 3 & Accessories Needed to Get Start 🙂
Shop your Raspberry Pi here, i have given links for all useful stuffs which needs to start a Raspberry Pi at first time and some recommendation are also present. Use This Coupon Code to Get 5% Off on Banggood: dc0b7b
Select a Raspberry pi 3 or 4 Unit.
Raspberry Pi 3 Only
Raspberry Pi 3 (4 in 1 Pack)
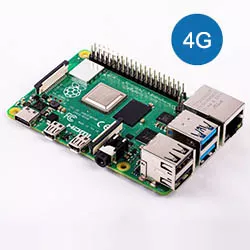
Raspberry Pi 4 (4GB)
Select a Display and Power Supply for Pi.
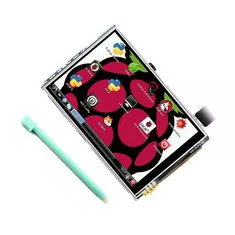
3.5 Inch GPIO LCD
5 Inch HDMI LCD
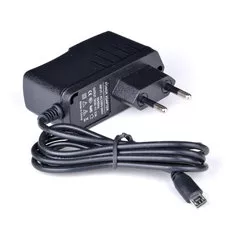
[EU] 5V 2.5A Power Supply
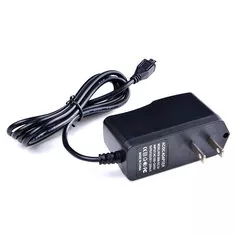
![[US] 5V 2.5A Power Supply](https://trickiknow.com/wp-content/uploads/2018/01/US-5V-2.5A-Power-Supply-1.jpg)
[US] 5V 2.5A Power Supply
[UK] 5V 2.5A Power Supply
Select Micro SD , Card Reader, Power Bank and VGA to HDMI Converter.
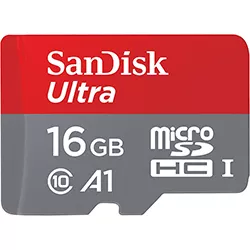
Sandisk 16GB MicroSD
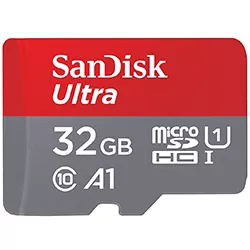
Sandisk 32GB MicroSD
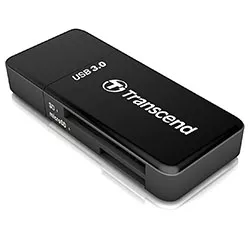
Memory Card Reader
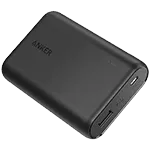
Anker 10000mah Power Bank
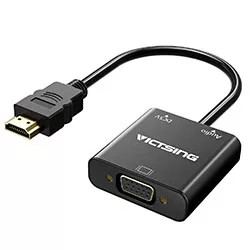
VGA to HDMI
If you want to use Raspberry Pi on a PC monitor & you have old monitor with VGA, you can use VGA to HDMI Converter. Power Bank is useful when you are operating Pi with 3.5 or 5 inch display, it will make it portable. In memory card , 16 GB is enough for beginners but if you are an advanced user you can go on to 32 GB or more. I am recommending these items because i am using them and i have showed the uses of every item in my video tutorial.
How to Install Operating System in Raspberry Pi
There are many operating systems (OS) for Raspberry Pi, some are for hacking, Gaming and Media stuffs. But all beginners starts with Raspbian Operating system which is officially developed by raspberry pi foundation and you can download it from the raspberrypi.org. The best part of the Raspberry pi all operating systems are free of cost. Now i am Going to show you how to install raspbian on raspberry pi. Follow the steps below:
Step 1: Download the Raspbian OS here: https://www.raspberrypi.org/downloads/raspbian/
(Make sure to Download the full desktop Version)
Step 2: Extract the OS image file with 7-Zip, Download it: http://www.7-zip.org/
Step 3: Insert your Micro SD card on a PC or Laptop using the Card Reader.
Step 4: Now you have to Download the Image flashing software, here it is: https://etcher.io/
Step 5: Open Etcher and select the Raspbian OS Image file , also select the memory card then click on flash.

Step 6: After flashing unplug the memory card from the PC and Insert it on the Raspberry Pi SD Card slot.

Congratulation !! You have successfully install Raspbian OS to the Raspberry Pi. Now Connect your Keyboard & Mouse to Raspberry Pi USB slot, Connect a PC monitor on Raspberry Pi Via HDMI cable (You can also connect it on TV).
How to Connect Raspberry Pi on VGA Monitor ??
Raspberry Pi have only one slot for display in the board, Which is HDMI. But if you want to connect the Pi to a old monitor which is have only a VGA port, then you have to use a VGA to HDMI Connector to do that. Just order the converter from the link above, then once you got connect it to the VGA cable just like the picture below.

Now You can plug the HDMI end to Raspberry Pi and the VGA end to the Monitor.
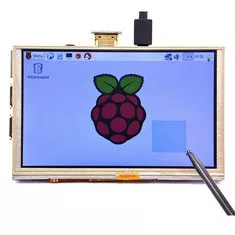
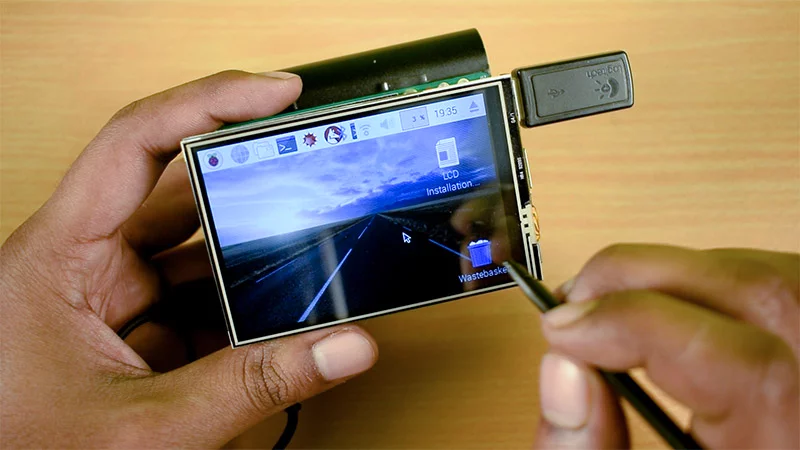
How to Install 3.5 inch LCD Display on Raspberry Pi ??
If you are wondering install LCD to Raspberry Pi, there are many versions of LCD for Pi but the popular and the cheap one is 3.5 inch LCD. This small LCD is easy to install, you just have to connect the LCD to the GPIO pins on Raspberry Pi. Just like the Image below.

Plugging the LCD will not work for the first time (you will get a white screen only) unless you have done some coding in Raspbian OS. Below are the very easy steps how to install a 3.5 inch LCD on Raspberry Pi.
Step 1: Connect your Raspberry Pi to a PC monitor, also connect the 3.5 inch LCD to Pi.
Step 2: Turn on the pi and make sure its connected to the Internet via WiFi or LAN.
Step 3: Open terminal in Raspbian desktop, and type the following commands.
sudo rm -rf LCD-show

git clone https://github.com/goodtft/LCD-show.git

chmod -R 755 LCD-show

cd LCD-show/

sudo ./LCD35-show
Step 4: Congratulation !! You have successfully installed your Raspberry Pi LCD.
But now the display will not visible on the monitor, it will only visible to the Raspberry Pi LCD. If you want revert back to the monitor, Open the terminal and type commands to get back.
chmod -R 755 LCD-show

cd LCD-show/

sudo ./LCD-hdmi
Note: If you want to install the 5 inch or 7 inch LCD or any, follow: https://goo.gl/nVxkDF
Build Retro Game Console with Pi (Watch Video)
So you learned how the Raspberry Pi 3 Model B works, its world’s smallest computer. Hope you enjoyed the tutorial, if missed something in this article give your feedback in the comment section i will fill that point in the article. Thanks for reading and watching Raspberry Pi 3 Tutorial, if you have any doubt comment me below i will like to give answers 🙂
I have a raspberry pi 3B I have the screen working after putting on the code after I rebooted then it just shows the cursor in the corner and I can’t type or nothing. I don’t know what happened.
for 4b not working i make the comands and only from light screen it makes dark blue screen …..
Tjis is basically a hole page saying:
To install the 3.5 screen, start your pi in console-mode and type:
sudo rm -rf LCD-show
git clone https://github.com/goodtft/LCD-show.git
chmod -R 755 LCD-show
cd LCD-show/
sudo ./LCD35-show
To revert, just type:
chmod -R 755 LCD-show
cd LCD-show/
sudo ./LCD-hdmi
So much scrolling for that. Get me right here. Love the help and would probably not have made it without it, but damn. I got here from some other guy that thought this needed a hole video. Why watch a hole frekkin video for this? I mean, a hole I’ll-talk-for-atleast-30-minutes-about-a-lot-not-related-to-this-solution-beside-being-my-boring-thoughts-on-rasberry…. Gah! Frekkin youtube that have an algorim that make everyone have to drag out their videos forever just to get clicks. ;:(
Hi,
Thank you for the tutorial, works fine, only I would like to see the screen on my lcd and hdmi at the same time, is this possible? I have a raspberry pi 4.
Is there a solution or way so you can choose between the 2?
Only lcd or only hdmi, or both?
Thx!
Thank you. This got my screen working in seconds, while I’ve been trying for days searching google with no luck. It really is super easy.
However, is there a super easy way to uninstall it? Not revert it back to HDMI, or disable it, but completely remove the script, or completely undo what the script does?
Thanks!
Can i connect screen HDIM in same time with tuch screen?
i get only a white screen!
Is there “uninstall” procedure?
Did your 3.5 lcd guide and it worked great. The only thing is I would like to rotate the screen 180 degrees. Everything I have done, does not rotate the screen. All the guides are for the official Raspi 3.5 lcd. Can you do something for the 3.5 lcd ( I have the same you did your demo with) to flip the screen on the raspberry pi 4b?
Thanks for your assistance videos.
i entered the coding to change from monitor to 3.5 lcd screen. then it stuck at Started Load/Save RF Kill Switch Status. what should i do?
do you knwo how to turn down, or off the backlight of lcd while HDMI is in use ?
i have read that older versions supported Numeric values.
It worked for me! Just a note that it will also work on command line only installation of rasbian. But will error for the configuration of X (as you don’t have any desktop installed). But ignore the errors and it will reboot with the screen working for the command shell. Excellent!
Hi Bro ,
I am using Raspberry Pi 4B (4GB) follow the steps and connected my 3.5′ LCD but it stuck at
[OK] Started Load/Save RF Kill Switch Status..
Any what to do next ?
OK, fixed my own problems, was using an old version of Raspbian, have upgraded to Buster and solved all the problems.
Still interested to know if having two FB’s running at the same time with different content is possible?
I had to update my rasperian.
These are the commands (3 lines, all start with sudo);
sudo apt update
sudo apt install –reinstall libraspberrypi0 libraspberrypi-{bin,dev,doc} raspberrypi-bootloader
sudo reboot
Not working for me.
pi@raspberrypi:~ $ sudo rm -rf LCD-show
pi@raspberrypi:~ $
pi@raspberrypi:~ $ git clone https://github.com/goodtft/LCD-show.git
-bash: git: command not found
pi@raspberrypi:~ $
pi@raspberrypi:~ $ chmod -R 755 LCD-show
chmod: cannot access ‘LCD-show’: No such file or directory
pi@raspberrypi:~ $
pi@raspberrypi:~ $ cd LCD-show/
-bash: cd: LCD-show/: No such file or directory
Try to update your raspbian versions, i was have raspbian with recommended software version.
sudo apt-get install git
that’ll install github clone software,which will automatically then fix your second (directory not existant) issue, as it will automatically create said directory for itself when it clones the github repository…
IF for whatever reason it doesn’t,
sudo mkdir LCD-show
will do the trick…
can we make these as shell scripts and run them to switch from one display to another?
how do you get the touch ability to work?
Its automatic , if your not working use calibrator 🙂
hola copie el comando en el editor y no funciona para visualizar la pantalla lcd
Hi,
thx for this tutorial and the corresponding YTvid.
Based on that I got my 3.5″ TFT running at my RasPi 3B+
Now, I want to rotate the screen AND the touch 180°
I found this script …
https://github.com/goodtft/LCD-show/blob/master/rotate.sh
… but is it good for my problem?
Would be really happy about some help.
THX in advance
Michael
Hi,
I saw your video on YouTube and tried to follow your directives to install LCD touch screen on my Raspberry.
my problem is when I try to get the clone img on GitHub.com the server ask for user ID and password.
Could you share the corresponding info in order to complete my install
Thanks
Wil
raise network interfaces
This shows the last thing you did not work with me, although I am following you
Hello Amir,
Thanks for your wonderful tutorial and excellent software support. My display works immediately.
Many thanks
Best Regards
Richard
You are most welcome 🙂
isnt the pen just a nintendo ds stylus?
Worked for me. Thanks
thank for it. before here, i lost 4dayz for the LCD.
but visit here just got answer now.
hi…..
friend i am sabbir hossain….i want to buy 3 pieces raspberry pi 3 b…and 3 pieces 3.5 inch LCD display with pen kit….
i think you can help me for buying this equipment….
i don,.t have any pay pal or bank account….so, that,s why i need your help….
if you can help me….
it is a pleasure for me….
you can directly email:-mdsabbirhossainsmartboy@gmail.com
Ask your guardians bro 🙂
quick question, sorry for bothering you;
HOW would I go about downloading the github repo separately and copying it over to my rpizero and then using the data FROM said clone on my pi….?
I dont have net connection on my pizero ya see, and cant connect things to my student pcs so need to download it separately does that make sense…?
sudo rm -rf LCD-show
is not needed when installing the LCD-Show and will actually lead to an error if not previously installed this the directory does no exist.
Also when switching back to hdmi the
chmod -R 755 LCD-show
is not needed imho, why do you recommend calling the chmod command every time you switch outputs?
how to calibrate the whole, if I go up with the pen the mouse pointer goes right, and who I go to the left goes down
I’m having troubles, I’m running it on RetroPie and it will not show the game on the screen, is there any way to fix this? Thank you so much TrickIKnow!
I got a weird color display on the 3.5 inch screen, is there any tuning ?
also can I run Kodi to display to this tiny screen ?
do it work on rpi 3 b+
how can i use it in drone?
can u help me out?
Hi I’m having a very big issue I am not able to keep my online active while I’m on West being in OS so I’m like I’m not a noob but I do need raspy and assistance thank you I’ll leave my address at the bottom I really need understanding and someone patient to teach me eaasily please thank you.
Hi Aamir
Just got myself a raspberry pi3 b+ board and a
3.5 inch touch screen with no instructions
480*320 lcd
When I connect them all I get a blank white screen. Assuming I have to install a driver to the lcd
My board comes with a 32g flash with noobs so I am assuming it since the screen is not active or installed I am not sure where to start.
I want to connect these to my Mac air can you help a newbie install this through
Thanks james
Have the 5inch screen
But it only shows av2 then no output and then just black screen
Want to use it as HDMI monitor for pie or as a secondary screen for PC
Hello, first of all thanks for your help! I searched a long time until I found her on YouTube and everything worked immediately and without any problems. Now I have a question and please :). Is there a simple solution for retropy? Is it possible to program so that when hdmi is connected, is automatically changed from gpio to hdmi? I would like to build a retro console that works as a handheld and tv. Thanks and keep it up! Channel is subscribed.
how to calibrate my LCD screen . the touch screen isn’t functional at all. tnx
I tried this method using just Raspbian, and it works. However, I’ve got Raspbian running under Retropie. When I run retropie, the KUMAN screen just shows text, with the HDMI monitor showing the game. Can you do a tutorial on how to install the Kuman screen and make it work with Retropie? Thanks!
did you figure anything out for this? I’m stuck with the same problem.
can u please tell me how to connect it to crt moniters
I have rpi 3 B+ and the LCD 3.5 display is working but not the touch. I use the june release of raspbian stretch.
se puede instalar windows 10 full, completa en mi raspberu pi3+?
ayuda porfavor……
Great tutorial!! Nice job with sharing the simple way to install the 3.5 inch LCD. The commands where quite easy and yet quite effective.
Hi,
I have Pi 2 and a 3.2 inch touch display. display worked fine but touch is not working.
any help is appreciated.
thank you.
Hi there ,
I’ve got rpi 2 and I follow the guide it worked but touch doesn’t work . Any help for me ?
Thanks
hmm I have the same problem…
Generally it works, but if not you have to add yours LCD touch code in the config.txt file.
I have use Kali Linux in respberry pi 3 with 3.5 TFT touchscreen. Now I want to connect monitor. What I do? Plz ask me sir..
hi my name is abir and i am making rpi 3 project and have installed os but when i connected to my laptop there was no responseso what can i do
Will it work on my 32 inch LED TV?
Ya sure it will work on your 32 inches tv , i saw some youtubers are giving demo on it 😀
do you need a specific power bank like 5000000mah?
can we comnect pi to crtv
Yes the CRT monitor comes with the VGA cable , you can use a VGA to HDMI connector for that 😀
will this work for a rasberry pi 4 b , and an inland 3.5 tft lcd
what do i do if my touch screen does not work
Ce n’est pas grave si j’ai une autre sorte d’écran avec driver et pour un Raspberry 3 a+ ?