How to make a Kali Linux Bootable USB Drive (3 Methods)

Hello Readers, Today I’m here with another interesting article. In this article, I’m going to tell you How to make a Kali Linux Bootable USB Drive using 3 methods. You can still use a DVD disc to burn kali Linux to operate but that is way too slow and in new computers, there is not any DVD ROM.
– Ads –
– Continue Reading –
You can use any of the 3 methods of making a bootable USB, according to your choice. In this case, you need a Kali Linux ISO file from their official website. Don’t worry it’s a free open-source Linux operating system.
So, Let’s begin:-
Method 1: Make Kali Linux Bootable USB Drive (using Etcher)
Step 1: Download the Kali Linux ISO File
Step 2: Plug your USB drive into a USB port of your computer.
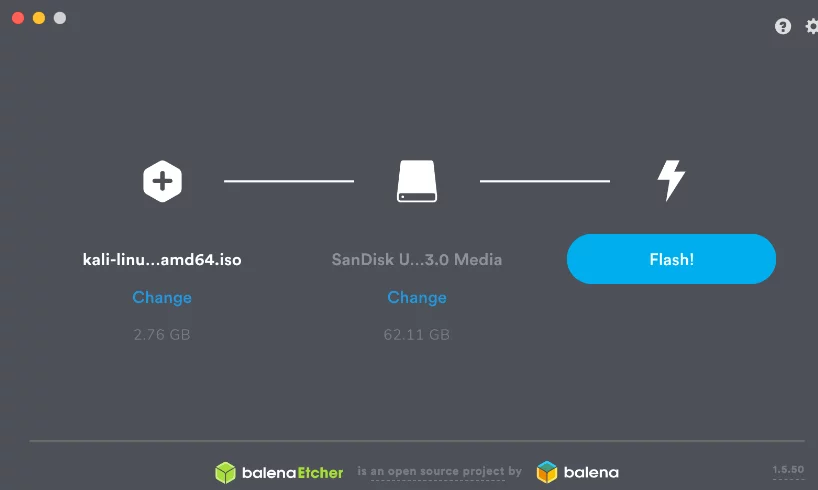
Step 3: Now choose the Kali Linux Image you have downloaded and also verify the USB drive that you have plugged in.
Step 4: Click on the flash button. Once everything is ready and verified.
Step 5: After that Etcher alerts you with a message that the image has been flashed. Then you can safely remove your USB and proceed to boot Kali with it.
Make a Kali Linux Bootable USB Installer (Video Tutorial)
– Ads –
– Continue Reading –
Method 2: Kali Linux Bootable Drive (Using Rufus)
Step 1: Download Kali Linux ISO Image.
Step 2: Now Download Rufus.
Step 3: Copy both of these Files on the Desktop.
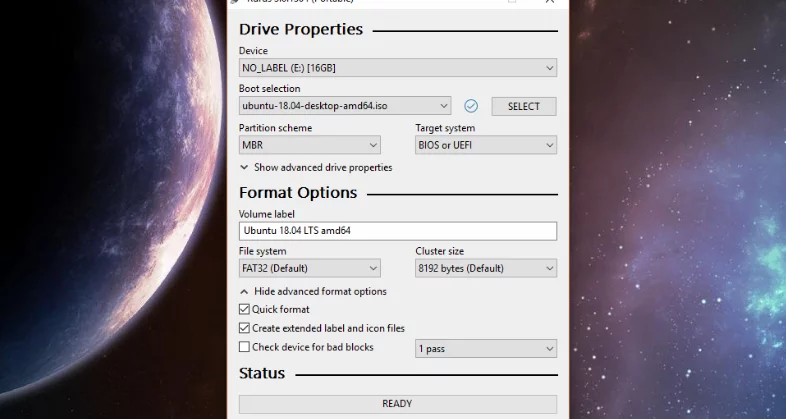
Step 4: Now open Rufus. Insert your USB and Rufus will automatically detect it.
Step 5: Format your USB Drive.
Step 6: Click on Select and Add Kali Linux ISO Image that you have downloaded in Step 1.
Step 7: After some time a pop-up appears to choose DD Method in that.
Step 8: It will take 5-10 min after that. After that Kali Linux Bootable Drive Created Successfully. Close Rufus.
Step 9: Now let’s check our Kali Linux USB. Restart and Boot From Your Kali Linux USB.
Step 10: Choose your Pendrive from Boot Menu.
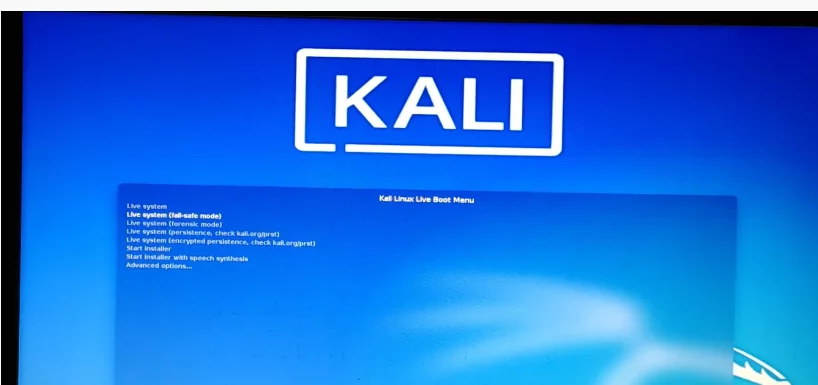
Step 11: After that. Click on the first option. Live system to boot into Kali Live.
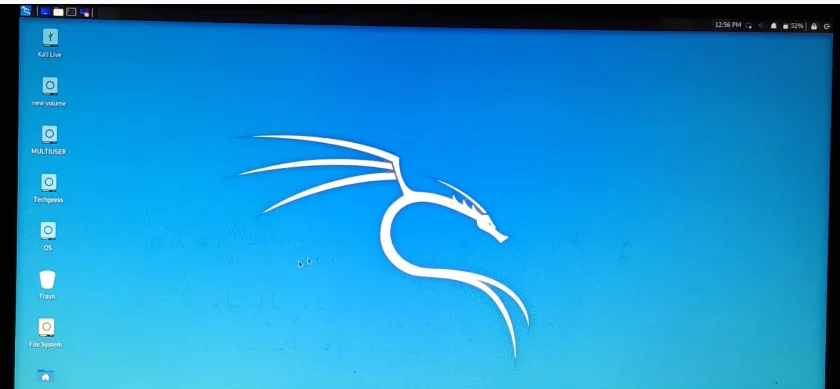
So, We have successfully booted into Kali Linux Live Mode using Rufus.
– Ads –
– Continue Reading –
How to create Kali Linux Bootable Using Rufus (Video Tutorial)
Method 3: Kali Linux Bootable USB Drive (Using USB Installer)
Step 1: Download Kali Linux ISO File and Universal USB Installer.
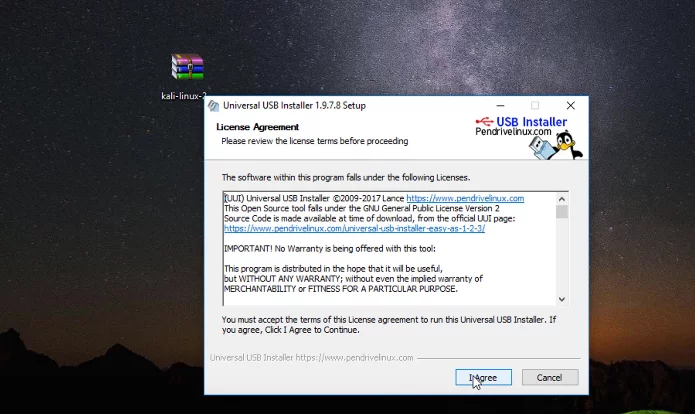
Step 2: Open USB Installer and click on Agree.
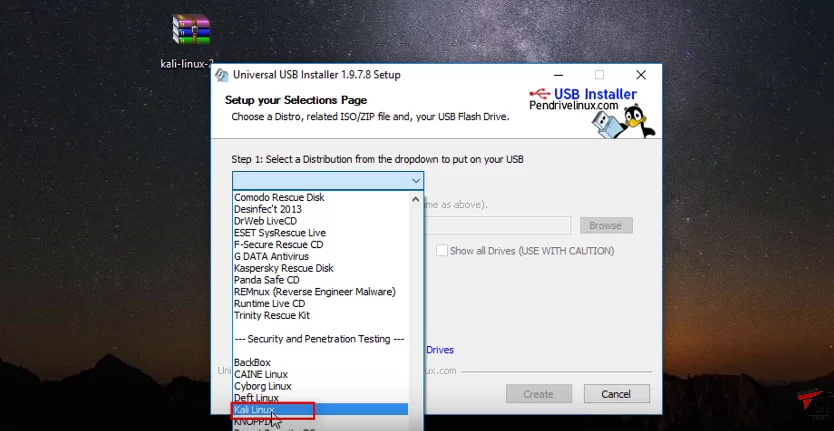
Step 3: Click on Kali Linux from the dropdown.
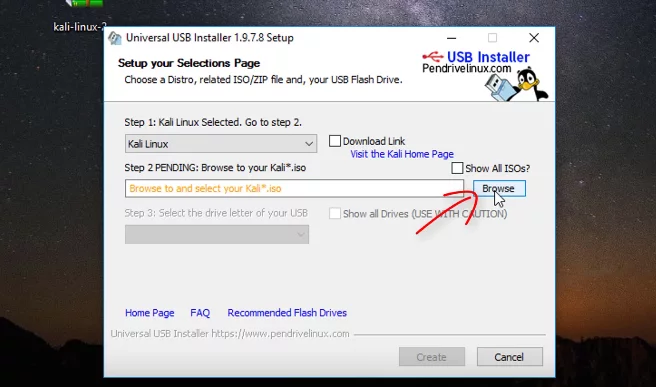
Step 4: Click on Browse to upload the Kali Linux ISO File and upload the File.
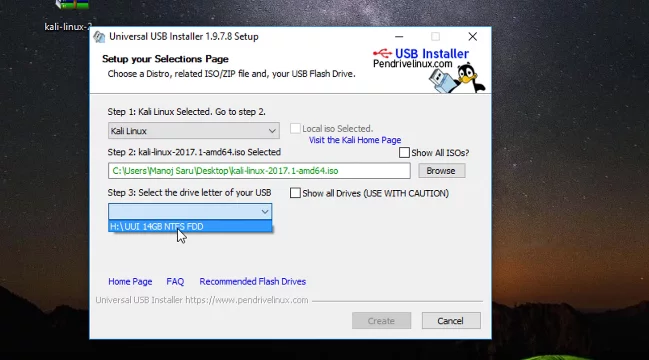
Step 5: Then select the USB Drive which you have plugged into your System.
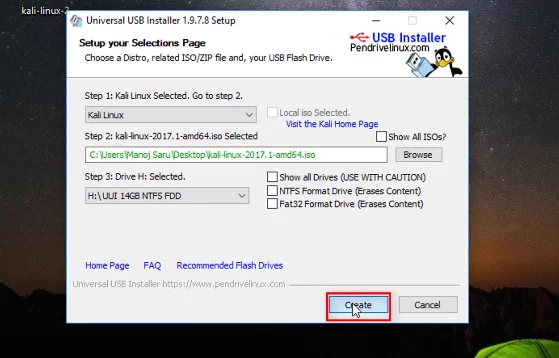
Step 6: After this just click on the create button.
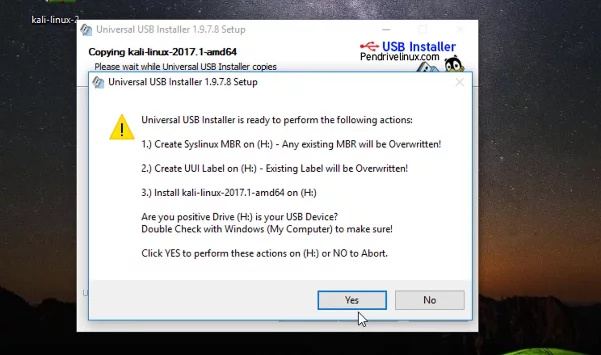
Step 7: Then click on Yes Button.
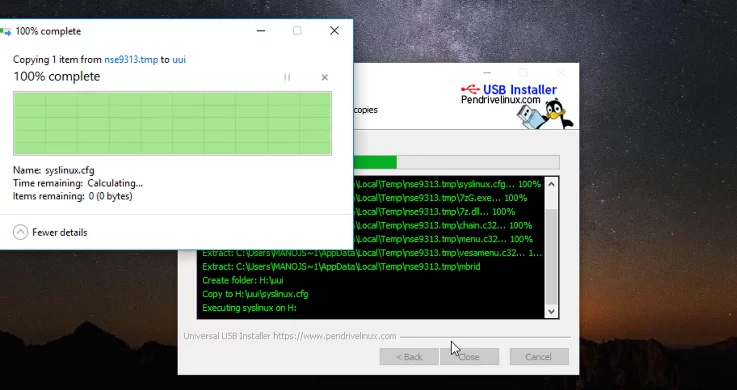
Step 8: Your USB Drive starts getting booted after this. This will take 5-10 mins.
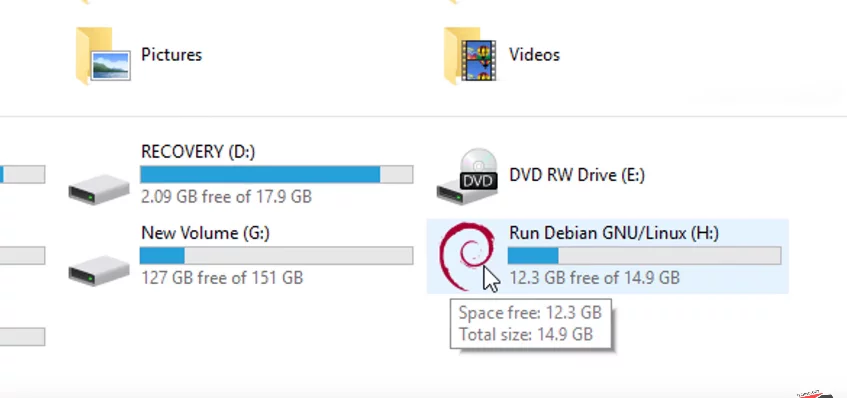
Step 9: After this remove your USB Drive and then if you plug it again, you will see that your USB Drive is booted as it will show the Debian symbol.
– Ads –
– Continue Reading –
So, We have successfully created Kali Linux Bootable USB Drive.
Kali Linux Bootable USB Via Universal USB Installer (Video)
So, Now we have created Kali Linux Bootable USB Drive by all three methods. I hope these will really help you and so if you have any queries please let us know in the comment section below.



Good Article