How to Dual Boot Windows 10 and Kali Linux (Risk Free)
 Dual Boot")
How to Dual Boot Windows 10 and Kali Linux
In this tutorial, I will show you how to Dual Boot Windows 10 and Kali Linux on a laptop or a desktop PC. So, you have a Laptop or PC with windows 10 or Windows 11 installed on it and, you are thinking to try Kali Linux.
But you are worried about your existing Operating system and Data (your personal files). The installation of Linux is a little bit confusing and there is a big chance of data loss, a single mistake can let your data destroyed in a fraction of seconds.
So, how to safely install Kali Linux from USB in the dual boot of Windows 10? The simple answer is, get a separate hard drive or SSD for Kali Linux installation.
Yes, these days SSD is getting cheaper and you don’t have to compromise or shrink the existing hard drive on which Windows 10 is installed and your personal data is stored.
In this tutorial, I’m gonna show you how exactly you can make a bootable USB to install Kali Linux from USB to PC or Laptop, how to install a new SSD for the installation, and step by step easy tutorial on how to install Kali Linux. Also how to install it on Windows 10, I mean dual boot Kali Linux and Windows 10. Let’s began the in-depth tutorial.
Kali Linux Download and how to make Bootable USB
To install Kali Linux from USB first you need to make a bootable USB, arrange any flash drive of at least 8GB in space. The second thing you need an accessible Windows 10 or Mac computer to make bootable Pendrive, and you need image flashing software called Balena etcher. It’s decent image flashing software and easy to use in windows and macOS.
Step 1: Download the Kali Linux Image file (Installer) from the official website.

Step 2: Choose the Installer Version & download the ISO via torrent. (You will need μTorrent)
How to write Kali Linux Image File to USB Drive
Step 3: Once you have downloaded the ISO file and etcher, open etcher.

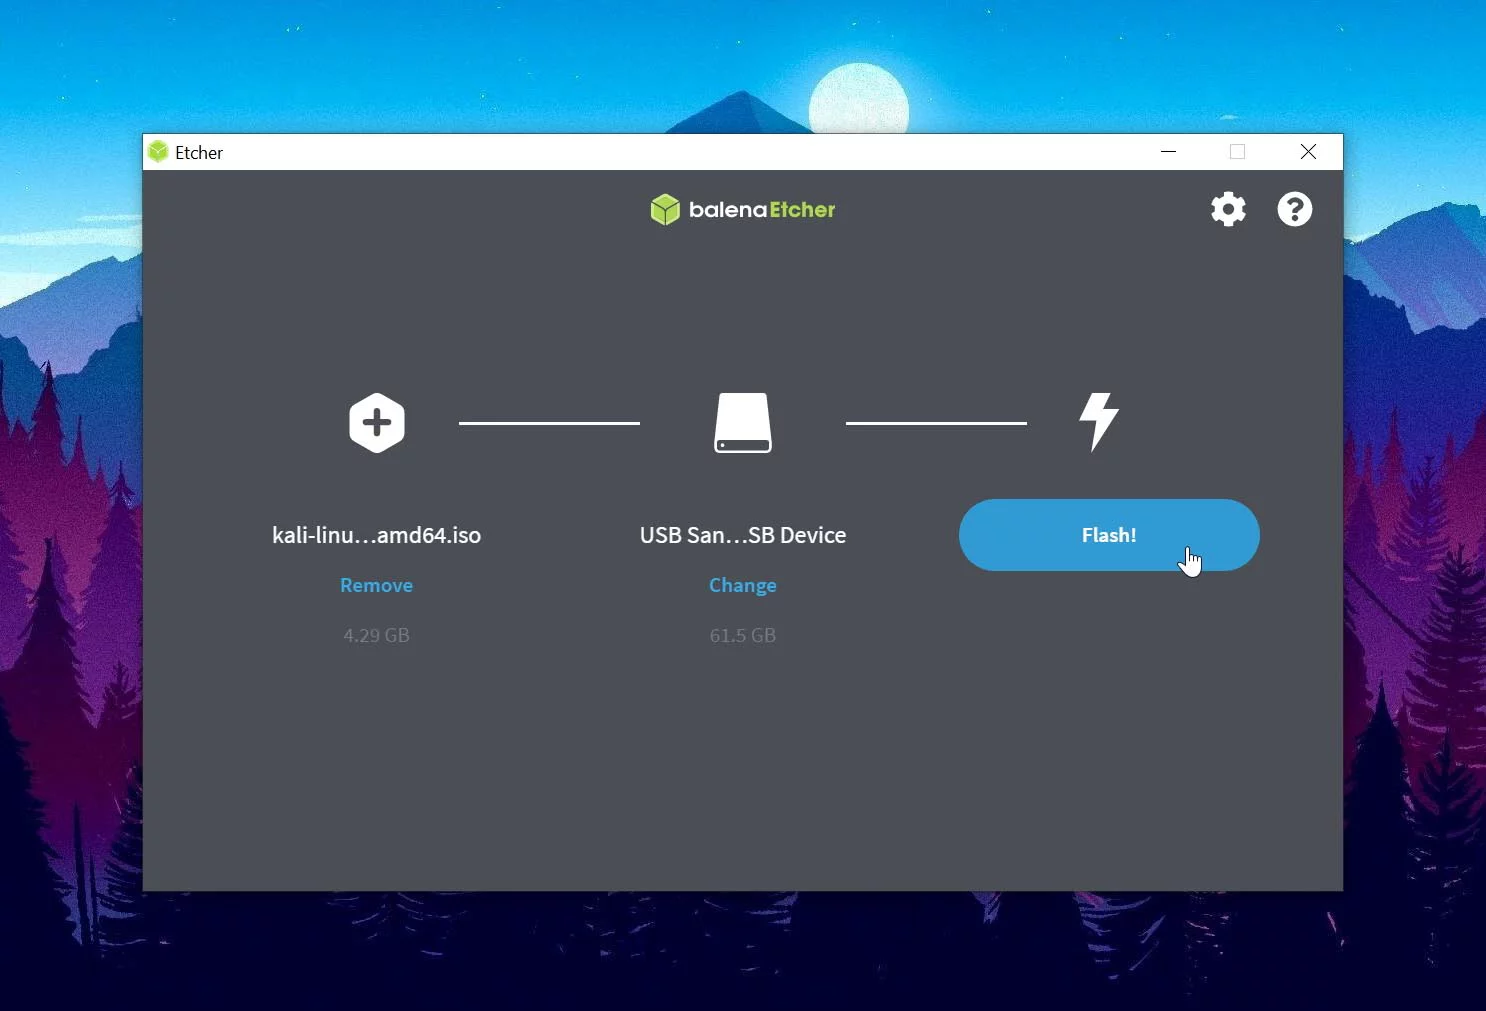
Step 4: Drag and drop the Kali Linux image file on + Icon.

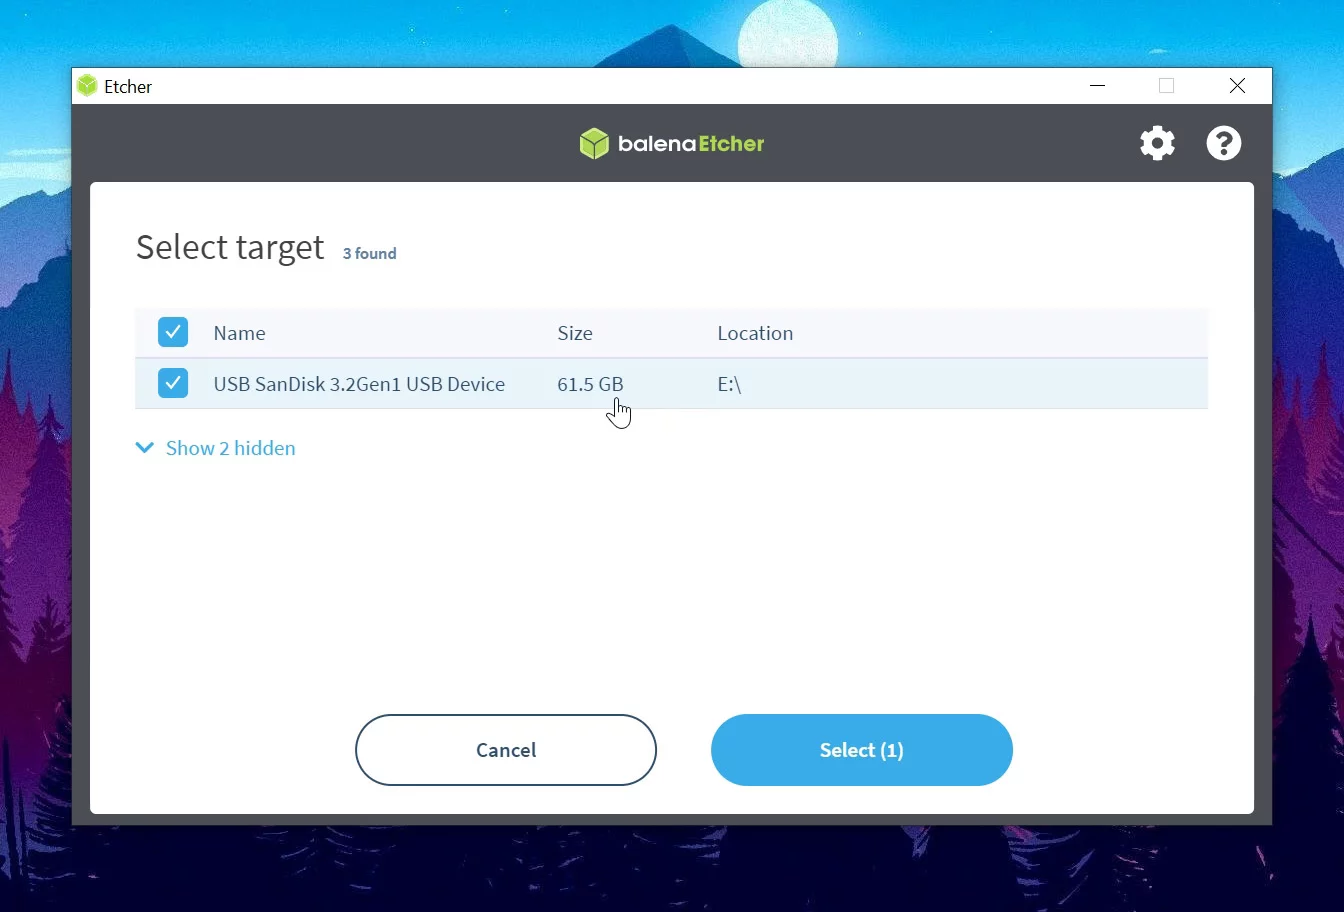
Step 5: Now select the Pendrive in the select target button. (Make sure the USB is plugged)
Step 6: Now click on the flash to write the Kali Linux image to the USB drive.
Note: This will format your Pendrive. (Make sure to Backup important files)


Step 7: This will take few minutes and Kali Linux Bootable USB will Create Successfully!
Once it created safely remove the Pendrive. Now the bootable flash drive is created successfully to install the operating system on a laptop or PC from the USB drive.
Get Ready Laptop or PC for the Kali Linux Installation
In general, a laptop has only 1 hard drive on which the Windows 10 OS, software, and data are stored. In some laptops there are 2 slots for 2 hard drives, So we have to install OS on the primary drive and store data in the secondary drive. In new laptops now there is an extra slot for m.2 SSD

If your laptop has only 1 slot for a drive then you can also add 2nd hard drive on a Laptop by replacing the DVD ROM with a 2nd HDD Caddy. To safely dual boot Kali Linux you will need a 2nd HDD caddy. To install the OS in a separate drive.
What you have to do, open up your laptop and take your Windows 10 HDD out of the laptop (if you have any other data drive in the laptop, take it as well). Now your laptop has not any drive, and there is not any risk of loose data.
Next, buy a separate SSD for Kali Linux installation, any cheap SSD like Kingston 120GB SSD, and plug the new SSD in the 2nd HDD Caddy and replace them with the existing DVD ROM which is obviously not in use.

Sata SSD (120GB)

2nd HDD Caddy

M.2 SSD (240GB)
Note: If your laptop has another empty M.2 slot the caddy is not needed, just buy the M.2 SSD. If your laptop has not any extra slot and has a DVD ROM then simply buy the Caddy and SATA SSD and replace it with the ROM. On a desktop if you have an extra M.2 slot buy M.2 SSD, if not you can also buy a SATA SSD as the laptop all you need a SATA cable only. Don’t buy Caddy for Desktop.
So now your laptop has a new SSD installed, and it’s ready to install Kali Linux on it and there is not any risk to lose any data or the existing Windows 10. Because those hard drives are not in the laptop, just keep them out till the OS installed in the new SSD.
The same thing you can do on a desktop PC also unplug all the hard drives present on the system and install a new SSD for Kali Linux installation.
Now, plug the Kali Linux bootable USB drive into the Laptop or Desktop PC, turn on the computer and then quickly press the boot menu key to open the boot menu.
In the boot menu you will see the new SSD and the bootable Pendrive, select the Pendrive and you will see the Kali Linux setup page. Follow the below instructions to install OS to the new SSD.
How to Install Kali Linux on Laptop from USB
Step 1: Plug Bootable USB, then turn on the PC and quickly press the boot menu key.
Step 2: In the boot menu select the bootable USB.

Step 3: Now USB will load the Kali Linux setup, select Graphical install.

Step 4: Select Language, Keyboard Layout, and Location.

Step 5: Select the WiFi adapter and hit enter. (If you are using LAN select the Ethernet)

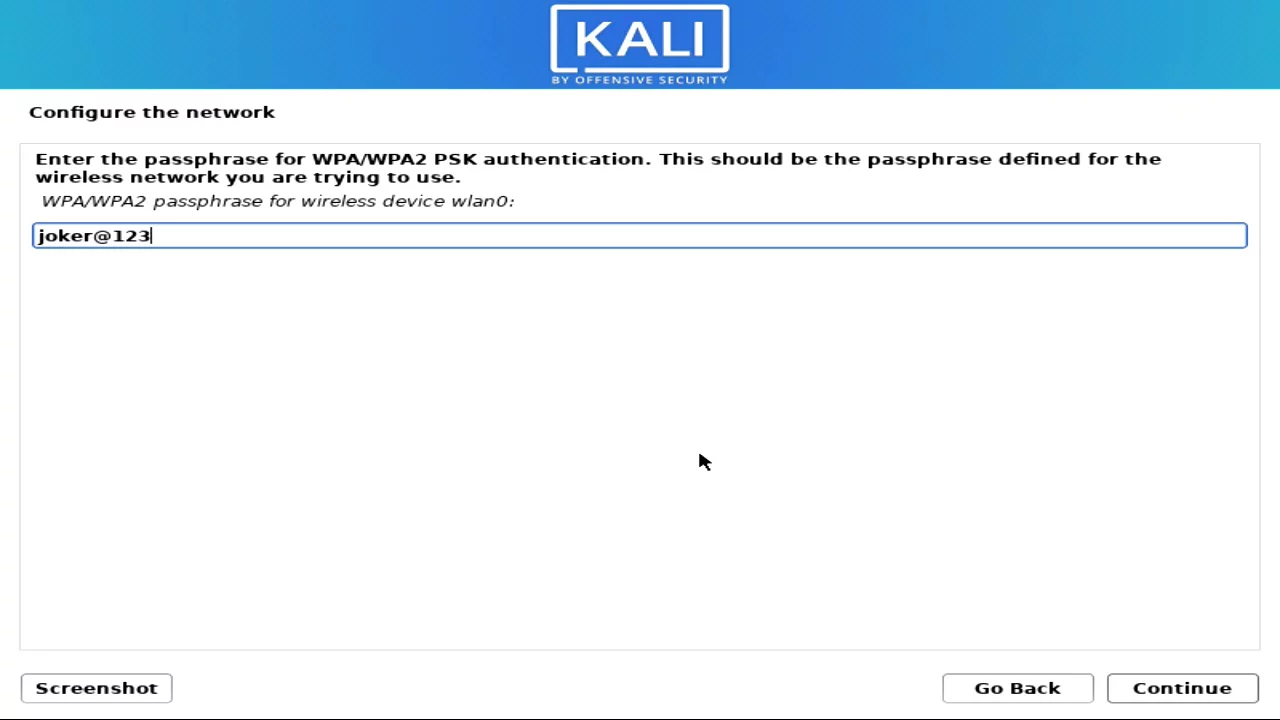
Step 6: Select home WiFi and enter and enter the WiFi password.


Step 7: Now enter a hostname like “kalihost” or leave it to default “kali” and hit enter.

Step 8: Enter a domain name like “localhost” or leave it blank and hit enter.

Step 9: Here enter the full name for the user, e.g. kali man.

Step 10: Create a username in small letters without any space and continue.

Step 11: Create a password for the user and continue. (Note: it will ask in login)

Step 12: Select the time zone clock.

Step 13: In the force UEFI installation page, select NO.

Step 14: It will ask for partition disks. As we are going to install the OS in a new SSD, Select the Guided – use the entire disk partitioning method. (We don’t have to worry about data because the SSD is empty)

Step 15: Here you will see 2 disks to select. 1st one is the SSD and the second one is the bootable USB drive. Select the SSD and hit enter.

Step 16: Select All files in one partition and continue.

Step 17: Now kali Linux will create a Primary partition and a Swap partition automatically, Select Finish partitioning and continue.

Step 18: Select yes to confirm the changes to the disk and continue.

Step 19: After few seconds it will ask you to select software, keep it default or you can check Gnome mode also. (It’s a cool theme for the Kali Linux OS.)

Step 20: In a few seconds it will ask for Configuring gdm3, select gdm3, and hit enter.

Step 21: After few minutes it will ask for the GRUB boot loader, Select Yes, and continue.

Step 22: Now it will ask to install the GRUB boot loader, Select the SSD, and continue.

Step 23: A few seconds later setup will finish, and will ask to reboot. Hit enter. That’s it!

Congratulations!! You successfully installed the Kali Linux on the new SSD. After the reboot, the kali Linux log-in page will appear. Just enter the password that you set on the setup and enjoy your new Linux OS.


How to Dual Boot Windows 10 and Kali Linux (On Laptop)
So, you just installed Kali Linux on a new HDD or SSD, and now the setup is completed. Put the Windows 10 hard drive back to the laptop/desktop, Now your computer has 2 hard drives with two different operating systems.
If you turn on the computer it will load the Windows 10 hard drive as default, and the kali Linux drive will not show up in windows 10 (Because of different types of partition). That is a good thing because no one will know or interfere with the Kali Linux hard drive.
To access the Kali Linux all you have to do just restart your computer and open the boot menu, in the boot menu you will see your Kali Linux hard drive. Select it and hit enter, now it will load your Kali Linux operating system.
So you can secretly use the 2nd OS like that, or you can change it from the bios, just make your kali Linux drive a first boot drive then save changes and exit the bios. Now every time Kali Linux will load as default.


The same thing you can do on PC also, just go into the bios and in the boot tab you can set to boot Kali Linux or Windows 10. If you have any confusion the watch the in-depth video below it will clear all the doubt.
How to Dual Boot Windows 10 and Kali Linux (Video Guide)
Thanks for reading and watching our tutorial on how to dual boot Windows 10 and Kali Linux on Laptop and Desktop PC, hope your installation is successful and you are enjoying the new Operating System.
If you have any questions, leave a comment below. Thank you for the visit, stay healthy stay safe, and have a great good day.
But this is not a technical method. Cant we install two os in the same hard disk?
we can…..