How to enable G Sync on FreeSync monitor (with NVIDIA Card)
")
Enable G Sync on Radeon FreeSync Monitor (Nvidia GPU)
In this article, you will learn how to enable G Sync on FreeSync monitor. So, you have a monitor with AMD Radeon FreeSync technology but your PC has an Nvidia Graphics card installed. You tried to enable the G-Sync from the Nvidia control panel, but the G-Sync option is not showing in the control panel.
The first and the main reason is your monitor is not a G-Sync Monitor, its a AMD FreeSync monitor for AMD Graphics Card, SO here you are missing V-Sync on your Games and seeing screen tearing. But the good thing is you can forcefully enable G-Sync option in Nvidia Control Panel, were the option is not available right now.
That is because you are using an HDMI cable connected between the monitor and the GPU. To enable G-Sync on a Radeon FreeSync monitors, first of first you will need a DisplayPort Cable that is also called DP Cable.
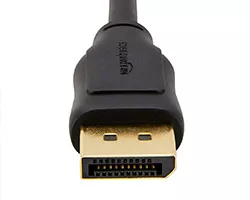
What is DisplayPort Cable?
What is DisplayPort cable? It’s a more advanced audio video cable thank HDMI cable, as in HDMI the resolution is limited to 4K at 30hz weather the DP cable supports 8K at 60hz, multiple video streams, audio, network, 4K stereoscopic 3D, 21:9 aspect ratio, most important adaptive sync and other data signal.
DP cable is a complete package of all of these things. If you are using a big display like 27 inches 4K monitor, 32 inches, or an ultra wide monitor then this cable is a must. Below is a picture how it looks.

To enable the G-Sync option in the Nvidia control panel you must have to connect your monitor and GPU with a DisplayPort cable. If you don’t have a DisplayPort cable check the link below and continue enabling G-Sync to merge FreeSync with Nvidia card.
DisplayPort Male to Male Cable
What is G-Sync and why it is useful?
G-Sync is a display technology developed by NVIDIA that synchronizes the refresh rate of a monitor with the frame rate of a compatible NVIDIA graphics card. This helps eliminate screen tearing, reduce stuttering, and minimize input lag, resulting in smoother and more responsive gameplay.
Traditional monitors refresh at a fixed rate, which can cause visual issues when frame rates fluctuate. G-Sync dynamically adjusts the monitor’s refresh rate to match the GPU’s output, ensuring a seamless visual experience. It’s especially useful for gamers seeking fluid performance and competitive advantage in fast-paced or graphically demanding games.
How to enable G Sync on FreeSync Monitor?
So, let’s begin the installation. Time to fix it out, follow the tutorial to continue:
Step 1: Turn off your system and unplug the HDMI cable from the system.
Step 2: Replace HDMI with DisplayPort cable to the DP-IN socket of the GPU and monitor.
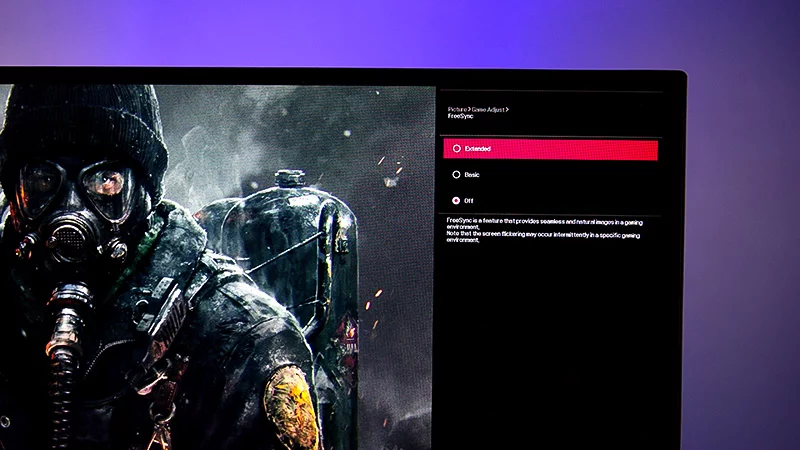
Step 3: Turn on your system then first enable the FreeSync from the monitor OSD Menu.
Step 4: Now right-click on the desktop and open the Nvidia control panel.

Step 5: Here you will see Set up G-Sync option is available, now enable it and hit the apply button.
Note: if you selected full screen mode then select the same in-game setting.

Step 6: Now, go to Manage 3D settings and set the monitor technology to G-SYNC Compatible, and turn on Verticle Sync On.
Congratulations! you just enabled G-Sync on the FreeSync monitor with an Nvidia card, the monitor I used in this tutorial is LG 27UN850-W and in my system, I have Nvidia Gforce GTX 1060 Graphics card. But process will be the same for monitors with different brands like HP, Benq, Samsung, Asus, or Acer monitors.
Now the final thing you can do is, in the game settings enable the V-Sync and boom! No more Screen tearing.
How to enable G Sync on FreeSync Monitors (Video)
Thank you so much for reading and watching our tutorial on How to enable G Sync on FreeSync monitor, hope you enjoyed it and your problem is fixed. If you have any questions on this topic, comment down below. Thanks a lot for your visit, have a nice day.
Hello,
If I have a monitor AMD Radeon FreeSync monitors, and a Acer wich has a GTX 1650 GRaphic card wich doesnt have a Display port what can I do to use the G-sync?
Thank u very much